Showing posts with label DIY. Show all posts

Tuesday, 14 July 2015

Small office ideas and DIY's

Hi All,

Having a small office at home I decided to share some ideas I have found on the web to inspire you to create fresh and fun office space. Gone are the days where office was blend, boring and grey. Add color and accessories to brighten up the space. Make it your own and let you personality overflow into the room.

Before you start decorating etc., first you need to follow these steps...


1. Throw away all items that is not needed are that are expired. 
2. Group your items together, for example stationery, notepads etc. 
3. Figure out what are priority items that gets used most often. 
4. Look at the space that you have and measure all the spots where storage can be inserted in order to buy correct storage. 
5. Once you have bought all the storage, be sure to start labeling.
6. Now that everything has its own space, its time to decorate and make it functional.

Here are some ideas on how to create a fun and creative office space. 


Source: The Lauren Elizabeth

Source unkown

Source: I Heart Organizing
Source: House of Rose Blog


Source


Thank you so much for visiting my blog. I hope you found some inspiring ideas to freshen up and organize your office space. 


Wednesday, 17 June 2015

DIY: Kitchen organizing ideas and a FREEBIE!


Hi All,

Sjowee I haven't done a DIY post in a long time. 
Since I am on a mission to organize my house. I thought I'd share few tips and ideas on what has worked for me so far. 

I always prefer to test drive any DIY's and ideas I find on internet etc. And also try to modify where needed. 

Kitchen. A place in everyone's house where everyone always seem to gather. No matter how nice your entertainment area is, many times everyone will gather in the kitchen. Why? I mean, come on, that is where all the magic happens. Hehe. 

To be proud of your kitchen and don't feel embarrassed when people open your cupboards etc. See some easy organizing tips and ideas to organize your kitchen. 
Below that I've made two different kinds labels and instructions on different ways of using them.

Happy Organizing All!


And here are some great ways of organizing using jars. Plus a label freebie at the end!


Here is two types of labels and some handy instructions on how to get to use them.


Instructions:

(1) 
Click on the image and press 'save as' and save it anywhere on your PC.
(2)
Than insert the image into you Microsoft Word. Size it accordingly.
(3)
Once you have the correct size. Insert text and type out the word in the white space of the label.
(4)
Once you have all the labels typed out, press the magic button print.
(5) 
Another option is you can print it as a sticker, peel it and stick it onto your jar. 
(6) 
If like me, you don't have that option. than cut out the label, place it on the jar or the lid and cut out a piece of 'Desi-fix'. And neatly seal the label on. I've had mine for a long time on my jar and it seems to be last pretty well. I can wipe with wet cloth over it, but I don't think it will withstand a a soak in the sink or the dishwasher. 

Here is my thoughts on labeling:
I found that labeling not only allows you to find your goodies faster but it also helps putting the items back into the correct containers. Be sure that when you put the label on a jar or any container that you first check where is the container going to stand so that the labels will be visible. It is honestly the best way to organize any space in your house. 


Have a great day all!


Monday, 30 March 2015

DIY: Project organize kids room

Hi everybody,

Okay, this is still a bit of an ongoing project for me. As I still try to figure out what works best for my son’s room. Often ideas that found on the internet might not always work for your child.

Below is some clever tips and ideas on how to organize your child’s room. I must admit, some are still ongoing projects, but most of them have been happily accomplished. As I have a boy, most are examples for a boy’s room. But I’ll do my best to include some ideas for the girls.


    1. Box it and label it

Who ever invented these awesome clear storage boxes was a genius. It is one of the best things to invest in when organizing any area in the house. If you feel overwhelmed as to what size, type etc. box to buy, don’t stress here’s few pointers. First sort out all the toys. Be sure to sort it into categories that your child will understand the best. For my son I put all the action figures together and all the legos together. Next, measure the shelves or space you have allocated for the boxes. Write the sizes and off you go to the shop. Now that toys are sorted, box is purchased, it’s time to make some cool labels to make it easier for your child to put the toys back in their correct boxes.


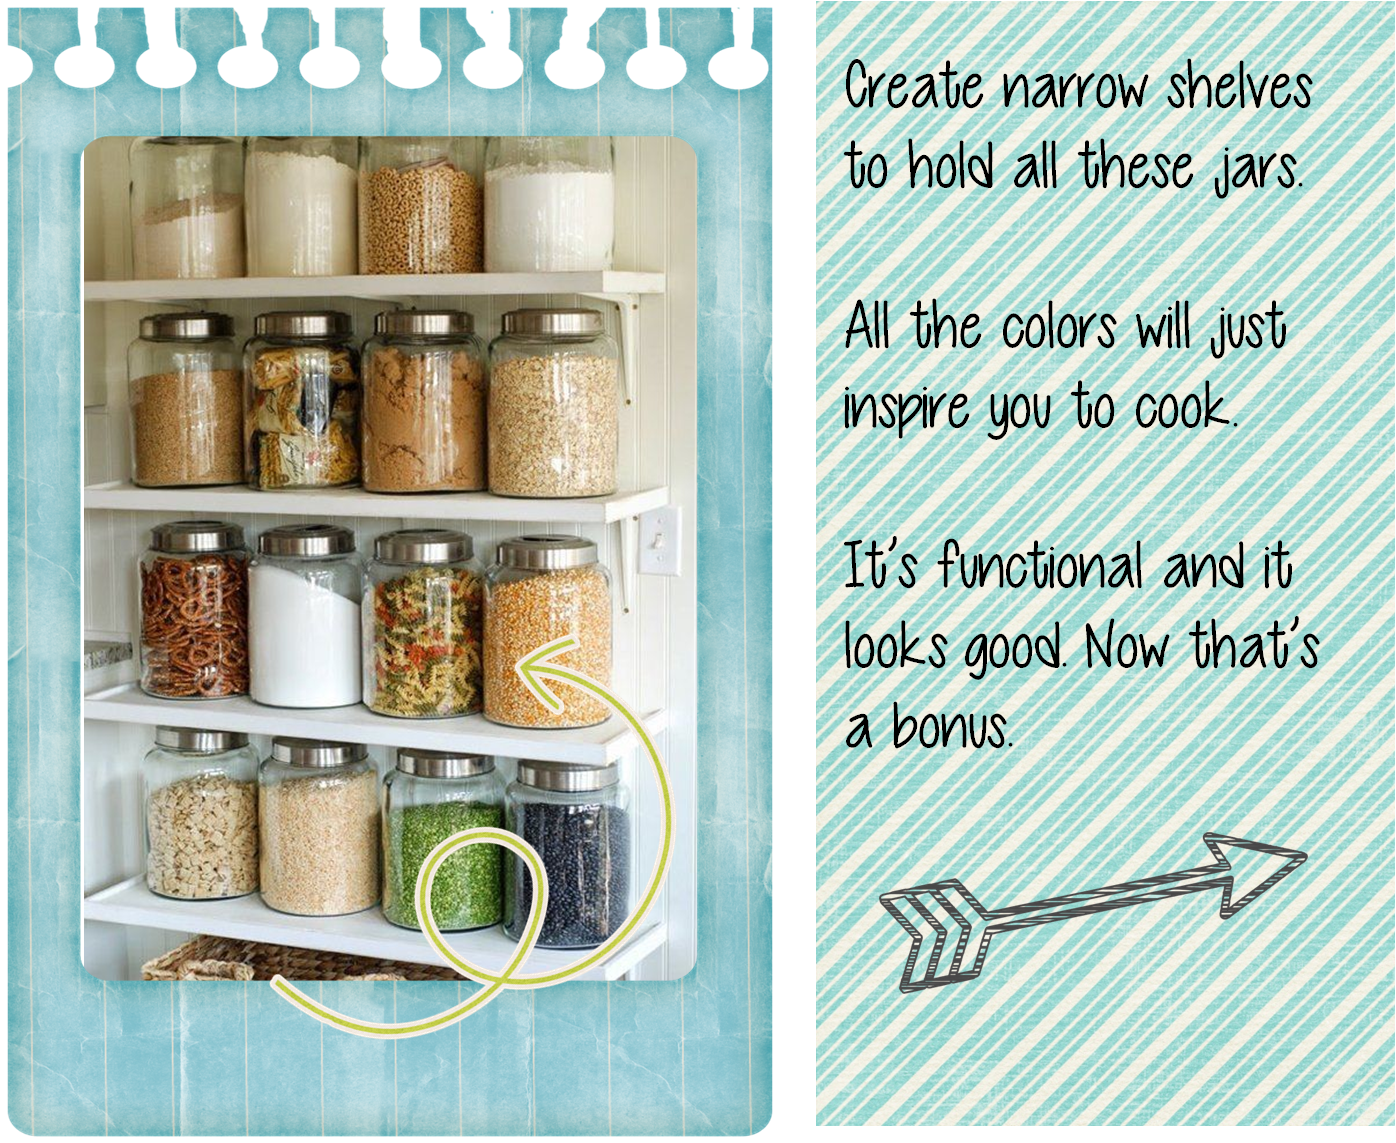
     2. Make use of wall space

Create space by hanging shelves or little cubicles for books Just remember to hang them within reach of the kiddies. Below are some ideas for wall storage. Make the shelves narrow so that they won’t become cluttered.


    3. Keep floors as clear as possible

By keeping floors as clear as possible, it gives you kids more space to play and it makes it easier to keep it clean. If you have baskets for toys try to hang them on the wall.


     4. Create storage

One of the nicest ways to create storage in kids room without taking up too much space is under the bed. I was lucky enough to have a hands on hubby and he created this awesome baby cot  that we converted into a ¾ bed with storage underneath. For now I use those baskets as storage for small baby clothes that I want to keep, extra teddies etc. Later on my son can use it for more of his toys sport stuff etc.


    5. Create a command centre

This is such a great way to hang up all those beautiful artwork. I also use it to put up Aidens routine schedule and reward chart. At the bottom of the board I added a strip of chalkboard. It’s a fun way to encourage kids to be creative. Also what is really nice about the board is that it will grow with my son. As he goes into primary school and high school, he will be able to put up reminders for homework, his achievements etc. Solution to all those loose papers.


    6. Sort regularly

It is amazing how many broken toys gets stored away, taking up un-necessary space. Same goes for toys your child simply doesn’t  play with anymore. So instead of increasing the storage space, be sure to firstly sort and go through all their toys.

***************************************************************


Thank you for stopping by and reading my post. I hope it gave you an inspiration to organize your kids room.

Cheers


Wednesday, 10 December 2014

DIY: Christmas Series: Home made christmas decorations

Hi Eeverybody welcome to my first DIY post. 

What better way to start of DIY’s projects than with Christmas Decorations. 
Handmade decorations are just the best, they are like wine, every year they just become more special.
My son will be 4 years old this January and his curiosity in my crafts have grown, so I have decided to let him join me in creating amazing Christmas decorations. But don’t let it just be a craft session, talk to your child about Christmas, the symbols and the meaning of it. Allow them to do as much as possible to teach them creativity.

Here is my top 5 Christmas decoration I have decided to do with my son:

1)      Ice cream stick stars


Materials needed:
Ice cream sticks
Embellishments/glitter
Glue
White paint
Yarn

Instructions:
    - Stack the sticks to make a star shape
    - Glue all of them in the centre
    - Make hole in just one stick where it will be hanged
    - Paint the star with white paint and let it dry completely
    - Apply embellishments., glitter anything that will sparkle on the Christmas tree.


2)      Candy cane sticks

Materials needed:
    Pipe cleaners
    Red and white beads

Instructions:
    - Thread beads onto the pipe cleaner alternating in colors
    - Make a small loop at the ends for the beads not to fall off
    - End the pipe cleaner in shape of a candy cane.


3)      Paper chain

Materials needed:
- Craft paper
- Glue
- Scissors


Instructions:

- Cut craft paper into 1 cm wide 
and about 5cm long strips
- Get them all read
- Start making circles and gluing the ends.
 Link the circles before gluing the next one forming a chain.


4)      Clay / salt dough glow in the dark ornaments


Material needed:
- Clay or salt dough
- Cookie cutters
- Yarn
- Glow in the dark paint (if you don’t have any use glitter)

Instructions:
- Roll out the dough and with cookie cutters cut out shapes
- Let the dough to dry for at least 24hours
- Once its dry, get creative with either glow in the dark paint or glitter


5)      Painted pines cones

Materials needed:
- Pinecones
- Craft paint
- Glue
- Glitter

Instructions:
Get creative, paint the pine cones different colors.
- Sprinkle glitter


Thank you for stopping by and reading my post. I hope it will inspire you to create amazing Christmas ornaments with your kiddies. Such special bonding time.
Happy Crafting.